Tuesday, June 2, 2015

Difference between PDM vs. PLM?

Field Guide for Identifying PDM from PLM

Article courtesy Edward Lopategui of E(E)
 
What’s the difference between Product Data Management (PDM) and Product Lifecycle Management (PLM)?  Only one letter separates the two loaded acronyms, and customer confusion, especially in today’s marketing environment is totally understandable.  This simple field guide arms you with the knowledge to understand the distinction, and to help you make more informed enterprise software decisions that match the needs of your business.
 
In the simplest terms, PDM is a subset of PLM.  Let’s think about the entire process behind any engineered product.  That process is the product lifecycle.  You can break that process down into several distinct steps, but don’t assume that necessarily implies a linear process.  There is quite a bit of overlap in the steps, and many of the best organizations try to do as many of the steps in parallel as is reasonable.  In general, the steps are:
  • Ideation: When a product is conceived, this may be derived from stated requirements, market research, or just plain falling off the toilet and doodling a flux capacitor on a napkin.
  • Design: The stage where the idea is refined, vetted, analyzed, simulated, and otherwise turned into a virtual product.  Computer Aided Design (CAD) and Computer Aided Engineering (CAE) is central to this process these days.  This includes characterizing supply and procurement for component parts as well as raw materials. It’s a highly iterative process, and in the best organizations it’s coupled tightly with ideation.
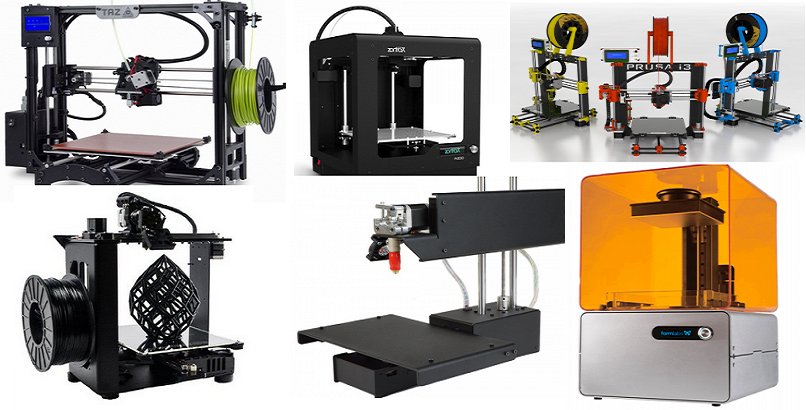
  • Build: The step where the virtual design is turned into reality.  This can be as simple as a 3D print, and as complex as a new factory with supply chain, tooling, and an assembly line specifically tailored for the product.
  • Support: Once the product is a reality, it needs to be distributed, delivered, sold, and serviced.  Upgrades, recalls, customer feedback, every activity associated with a product out in the wild falls within the support realm.
  • Disposal: Every product has an end of life from a single use to a hundred years.  A product’s end of life may be instantaneous or it may be phased out over time.  In the past, this stage might have been all about throwing things away, but these days ongoing customer relationships, recycling opportunities, and regulatory concerns factor into this stage.
PDM-PLMIf we visualize the lifecycle as a continuous loop, it looks like this: 
 
PLM encompasses the entire circle. 
 
PDM was most often strongly associated with just design, because at least historically the majority (but not all) of the data management occurred in this stage.  In early incarnations, PDM was strictly a CAD management technology, and access was typically isolated to design staff.  As CAD visualization and collaboration technologies have evolved, elements of PDM are now much more relevant throughout the lifecycle.  The short of it is this: the PDM of today is much more sophisticated and expansive than the PDM of the past.  So both PDM and PLM encompass this lifecycle.  CIMdata, an established PLM industry market analyst and consultancy coined a term called cPDm (Collaborative Product Definition Management) for this reason.  You could read their definition, but it’s likely to give you a migraine, so I’ll boil it down to this.  What CIMdata calls PDM is the PDM of the past.  cPDm is the PDM of today.
 
It would seem that differentiating PDM and PLM has become a little arbitrary, but here’s an easy way to keep things straight:  PDM is primarily concerned with just the engineering data needed to define the product design and little else.  Typically these are CAD files (mechanical and/or electrical) but can be other file types, including drawings and documents.  Any process, security, or configuration control capabilities of PDM are limited to just that engineering data.  PLM on the other hand, not only includes all the data in PDM, but also all the other data, people, processes, and decisions made throughout the organization in the context of that lifecycle.  So PLM capabilities are decidedly more complex and far reaching.  If your business is just trying to manage engineering data – PDM is the first step, PLM is the second step once you want to tie multiple processes across the enterprise to work in an integrated manner.
 
You may find that evaluating available products on the market may still lead to confusion.  Why is this so?  It’s not your fault.  There are actually several very genuine reasons why the lines between PDM and PLM are often quite blurred:
  • Keep in mind that most of the popular PLM software products evolved from PDM tools; sometimes that heritage is very apparent.
  • The first PLM software tools differentiated clearly from classic PDM tools.  However, most (but not all) of the modern tools actually include elements of both.
  • No single tool truly captures everything defined in PLM.  Often businesses end up with a suite of applications with different strengths in different spaces that have to be integrated.  Any claim of a true end to end solution should be taken with a grain (or truckload) of salt.
  • No one truly controls the definition of PLM.  The old saying goes if you ask ten different people about PLM, you’re likely to receive ten different answers.  Add in marketing types and that quickly turns into a thousand different answers.
  • Often (but not always) a particular vendor’s PDM solution is either embedded into or requires installation of their PLM solution or vice versa
In summary, if you are primarily concerned with CAD integrations and management of technical product data, PDM is your cup of tea.  If you are looking for more expansive solutions then look towards PLM.

Wednesday, May 27, 2015

Think Before Choosing New CAD Tools

The adoption of CAD technology for product design is widespread across the globe. There are a number of CAD tools available today that offer cutting-edge technological advancements with every new version launch.

However, does all the hype around the latest CAD tools actually help the organization in developing products better and faster? For some, adopting new technology is simply to ensure that they are not left behind, while there are manufacturers that adopt new CAD tools just because their management feels that using some specialized tools can help in improving the design, but aren’t sure whether it will be right or not.


Recent research from Business Advantage identified that majority of the organizations prefer to continue with their existing established and proven CAD technology as compared to adopting newer ones. Choosing the right CAD tool as such requires proper understanding of the existing situation. There is no such thing as good or bad CAD tool; instead there is definitely one best CAD tool for a specific task. It is the duty of CAD managers to think beyond the capabilities of the software available in the market and identify which one actually meets the specific needs of the organization.

It's important to identify the requirement of the organization before thinking of switching the CAD technology.

Following key questions are needed to be answered first:
  • What features will the new CAD tool provide to improve the design process?
  • Are there any phases in the design process that are broken or require overhauling?
  • How well are the existing systems optimized?
If 3D helps in obtaining better and more accurate designs, and the design process works smoother but needs an upgrade, then transformation to adopt a new CAD system can be logical. However, if the existing system is being customized to specific requirements of the design process, it is important to figure out the effect of losing all those important tunings that were done over many years.

The fundamental requirement before choosing the right CAD tool for your organization is to identify how the company’s design processes evolved using the existing CAD technology. If there are tools that can be improved by simply tweaking or optimizing them, the switch to new system would make no sense.

About Author: Nikunj Patel is a design engineer working with Hi-Tech CADD Services for the past 4 years. He loves designing specialized industrial equipments and can always be found in the lab discussing, brainstorming & tweaking designs. He has also worked on architectural projects taking interest in every aspect of design & analysis.


Monday, May 25, 2015

Cheapest, Best & Most Reliable Desktop 3D Printers — 3DPrint’s 2015 Buyers Guide

by · April 7, 2015

It’s rather crazy how many emails we receive on a daily basis asking us to suggest a 3D printer for a particular use. There are literally hundreds of different machines on the market, and several new printers launching each and every week. It can oftentimes be difficult to sift through all the clutter, especially if you are new to the industry. That’s why I got together with some of the writers here at 3DPrint.com to crunch our heads together and come up with what we feel is a pretty solid list of printers, which you really can’t go wrong purchasing.

These machines are listed in a particular order based on several criteria, but any printer that has made this list is probably not going to disappoint you in the long run. We used a combination of 3D Hubs’ rating system, combined with Amazon.com reviews, other third party review sites, reader feedback, and the experiences of the team here at 3DPrint.com to choose and then rank these machines to the best of our ability. This list is not static and will change weekly as we feed additional information into our ranking methodology, and as new printers emerge onto the market.

t1LulzBot TAZ 5
Aleph Objects and their LulzBot brand is one of the hardest working 3D printing companies I have ever come across. They have been growing by leaps and bounds, and I truly believe this is because of one main attribute–quality. The customer support is phenomenal, the printers are built on a completely open source framework, and the machines have some of the most useful features available on the market today. Although I have not seen the TAZ 5 in action or used it myself,  I have seen in action or used pretty much every one of their other machines and judging from the warm reception the TAZ 5 has received early on, I am willing to rank this printer as one of the top buys within the space. Boasting a spacious 298 x 275 x 250 mm build envelope, with the ability to print in a laundry list of materials, this printer should be on the top of your shopping list. With a company tag line of “Industrial Grade 3D Printing at Your Desktop,” I will not be one to argue. Priced at $2,200, it’s not the most affordable, but if you have the money to spend on a 3D printer, this likely is your best bet.

Pros: Open source, feature rich
Cons: Noise, ease of use

t3MakerGear M2
This 3D printer has to be ranked at or near the top of pretty much every 3D printer review site you will come across. Almost every review you will read, whether it be from Amazon where the last time I checked, 92 out of 97 reviewers gave it 5 stars, or the monthly 3D Hubs rankings, this is an exceptional machine for its price. The frame of this 3D printer is incredibly sturdy, and it utilizes some of the best components on the market. You will be hard pressed to find someone who has purchased this machine and has anything really bad to say about it. If you are looking for a printer which will perform just as well as any machine on the market, is priced lower than many of its main competitors, and has amazing customer support, this is the machine for you. This printer has a build envelope of 203 x 254 x 203 mm, and is priced at $1,775.

Pros: Customer support, print quality, sturdiness
Cons: Noise, ease of use

t4Zortrax M200
This machine continues to receive some of the highest user reviews on 3D Hubs among all 3D printers on the market. With a heated build platform, auto calibration, and a decent size build envelope of 200 x 200 x 185 mm, this machine packs a punch. It comes equipped with the company’s Z-suite software making the conversion of a model to a 3D print as easy as ‘1…2…3′. Priced at $1,999, it certainly isn’t the cheapest machine on the market, but as the saying goes, “You get what you pay for.” The company certainly has put its best foot forward with both this printer and their entire still-developing ecosystem.

Pros: Print quality, accuracy, and ease of use
Cons: Material compatibility, connectivity

t5Printrbot Metal Simple
Brook Drumm is considered by many as one of the grandfathers of 3D printing. His company, Printrbot, consistently releases quality products, which not only perform great, but are insanely affordable. This machine has won several awards, and continues to be one of the most well-received printers on the market today. With a build envelope of 150 x 150 x 150 mm, users are able to print items of a decent size, while not breaking the bank. Time and time again we have heard from users about how high the resolution of printed objects end up being, and the overall quality and sturdiness of the machine is apparent. In fact, priced at just $599.99 fully assembled, it’s hard to go wrong with this machine.

Pros: Sturdiness, print quality, price
Cons: Small print envelope

t6Formlabs Form 1+ 
This printer steps away from the norm when it comes to desktop 3D printing, and uses an entirely different process, Stereolithography (SLA). Although it may be a bit messier than the FDM/FFF processes, the Form 1+, by far, will give you the best overall print quality when compared to any of the other printers on this list. That’s because SLA technology is simply more capable of printing intricate detail. The Form 1+ is perfect for the business setting as well as for the home. Instead of strands of thermoplastic filament, the Form 1+ utilizes a photosensitive resin which could best be described as a syrup. The resin is cured (hardened) as it is exposed to a laser beam. It is able to print at layer thicknesses as small as 25 microns and has a build volume of 125 x 125 x 165 mm. Priced at $3,299 it is the most expensive printer to make our list–however, it’s really hard to even try and compare the Form 1+ with these other machines.

Pros: Print quality, ease of use, appearance
Cons: Cost to run (resin is expensive, electricity), material compatibility

t7MakerBot Replicator Mini
This is one of our favorites, not only because it’s ranked high by users overall, but because it’s small, elegant, and will enable you to open up access to the entire MakerBot ecosystem. If you want quality and the backing of a $2.5+ billion company (Stratasys) behind your printer, the Mini may be for you. Equipped with an on-board camera to monitor your prints, and incredibly easy software for transforming your models into physical objects, the Mini’s main shortcoming is its ability to only print with PLA, as well as its somewhat limited build volume of just 100 x 100 x 125 mm. If you are fine printing with PLA, which will still provide quite a range of materials options, and you aren’t looking to print large objects, the MakerBot Mini is likely a great bet, priced at just $1,375.

Pros: Ecosystem, ease of use, connectivity
Cons: Noise, print speed

t2Flashforge Dreamer
Back in September the writers at 3DPrint.com were provided one of these machines to review. Initially we gave it to a writer, Heidi Milkert, who had never had any experience using a 3D printer before. Remarkably, she was able to quickly figure the printer out and within hours had her first print sitting on her desk at the office. Case in point, this 3D printer is simple, reliable, and priced very affordably. With the ability to print with both PLA and ABS thermoplastic, and a build envelope of 230 x 150 x 140 mm, this machine is perfect for almost any 3D printing job. Priced at $1,299, this fully enclosed 3D printer is a solid buy.

Pros: Ease of use, print quality
Cons: Connectivity, noise

t8Ultimaker 2
Ultimaker is ranked up there with MakerBot as one of the top selling desktop 3D printer brands, and for good reason. The company has prided themselves on delivering high quality 3D printers which also look nice sitting on you table or desk. With layer resolutions as fine as 20 microns, and a build envelope of 223 x 223 x 205 mm, this machine is great for everyday home use. It will print with PLA, ABS, and U-Pet materials, is very easy to calibrate and get started, and is priced at $2,499.

Pros: Ecosystem, print quality
Cons: Cost to run, price

t9Prusa i3 Hephestos
Oftentimes the simpler the machine, the better it is. After all, the less likely it is for a part to malfunction if there are fewer parts overall. I’m a big fan of the RepRap movement, and have to say, some of the machines spawned from this movement are extremely capable, and best of all, affordable. The Prusa i3 Hephestos is of course an open source machine which was developed by the bq Department of Innovation and Robotics. With a build volume of 215 x 210 x 180 mm, and available in three different versions, each with varying degrees of resolution as well as print speed, this printer would be good for teenage beginners all the way up to professional designers. Priced starting at €499 and going on up, it’s incredibly affordable if you don’t need all the bells and whistles found in other machines.

Pros: Community, open source, print quality
Cons: Ease of use, print speed, noise

t10Afinia H480
Utilizing some of the best linear actuators available on the market, this small, yet powerful 3D printer has been well received by consumers and small businesses alike. It’s an older machine–in fact, it was unveiled back in 2012–but still tops the charts when it comes to reliability and precision. Afinia has since produced newer machines, but their older printer, the H480, seems to have been a bit ahead of its time. The build envelope for this machine is not the largest, at 140 x 140 x 135 mm, but that doesn’t stop reviewers from keeping it near the top in terms of ‘best bang for the buck.’ The H480 is priced at $1,299.

Pros: Print quality
Cons: Material compatibility, running cost (energy)

There you have it, out current list of the top 10 3D printers, when considering price, reliability, and quality. With new printers coming out weekly, please check back to this list weekly to see if anything has changed. We will also be adding new categories to the list in the future. Feel free to chime in with your opinion and provide your own personal insights in the ‘3D Printer Buyer’s Guide’ forum thread on 3DPB.com.

ppp

Saturday, May 23, 2015

BIM: Revolutionizing Building Life Cycle Management

Building information modeling (BIM) is transforming architecture, engineering and construction by providing accurate, timely and relevant information throughout a building's life cycle. While the use of BIM technology for facility management is still developing, the potential to dramatically improve the effectiveness of building life cycle management is clear.
The challenge faced by the facility management profession is the divide between the information used for building design and construction, and the information needed for effective facility management.

What is BIM?

The term building information modeling gained currency around 2002 through the writings of Jerry Laiserin. But Laiserin himself notes that BIM concepts go back to the early days of computer-aided design (CAD) in the 1980s, being described conceptually by researchers such as Charles Eastman and being implemented in working software in early CAD programs such as RUCAPS. Only recently have programs such as Autodesk's Revit, Graphisoft and Bentley systems converted the concepts of the '80s into practical, affordable software within reach of every architect and engineer.
At its most basic, BIM encompasses two key attributes:
  • Object intelligence: the ability to associate material and assembly data with graphic elements.
  • Three dimensions: complete three-dimensional graphic representation of buildings.

A more comprehensive definition of BIM has been proposed by construction company M.A. Mortenson1. According to Mortenson, BIM must exhibit six key characteristics:
  • Digital;
  • Spatial (3D);
  • Measurable (quantifiable, dimensionable and query-able);
  • Comprehensive (design intent, building performance, constructability, and including sequential and financial aspects of means and methods);
  • Accessible (to the entire AEC/owner team through an interoperable and intuitive interface); and
  • Durable (usable through all phases of facility life).

The current state

While BIM widely is considered to be a single, unified technology, this is not the case. Leading software developers such as Autodesk, Graphisoft and Bentley Systems have developed very capable technology that serves the building design, engineering and construction phases of the building's life cycle. Moving into the more diverse requirements of the occupancy and management phase of the building's life entails a variety of other technologies and software. Fortunately, software developers are moving rapidly to accomplish the integration needed between these various systems. Most likely, the result won't be a single software package but rather sets of compatible software programs that support interoperability.
Evaluating the current state of BIM technology against Mortenson's six criteria shows that BIM has yet to reach its full potential. Although BIM is digital, 3D and measurable, at this time it is not completely comprehensive, accessible to the entire AEC/owner team nor durable.

BIM benefits for building design

The benefits of BIM for architects and engineers are significant. First, for many design firms, the new BIM software tools support a better way of designing buildings. With the complexity of modern buildings and the difficulties of preparing construction documents using two-dimensional CAD drawings, BIM software programs provide major advances in managing information.
Second, the ability of BIM software to easily generate realistic three-dimensional views and even walkthroughs makes visualization a free byproduct. This not only provides valuable guidance to the designer, but also is tremendously helpful in communicating a design to clients.
Third, BIM software supports various types of building analyses. In particular, integration with energy analysis programs provides essential information early in the design process to guide decisions on building materials and mechanical systems.

BIM benefits for construction

Although the benefits of BIM during the construction phase are less obvious, they are compelling. First, the ability of BIM tools to track phases of construction is valuable in construction coordination. For general contractors in particular, BIM tools for coordinating space and schedules are very effective, particularly for large projects on urban sites where staging areas are always at a premium.
Second, software tools for clash detection provide ways to reveal layout errors in advance, thereby enabling more cost-effective resolutions and fewer expensive change orders.

BIM benefits for facility management

While BIM has proven its value in design and construction for five years or more, the necessary technologies for using BIM in facility management only now are emerging. A large number of new building projects have been designed and built with BIM software. However, there is a tremendous opportunity to leverage this store of information and greatly improve the practice of facility management.
Although we are still at the early stages of understanding the ways BIM can be used throughout a building's life, there are at least six areas that are proving valuable.

Preventive maintenance

Information about building mechanical equipment stored in BIM models is valuable in creating the database needed for ongoing preventive maintenance. Equipment that requires regular inspection and upkeep, particularly heating, ventilation and air conditioning equipment and life safety systems, are of particular significance. Additionally, information about air and electrical distribution systems that undergo periodic modification is valuable to facility managers.

Space management

BIM models provide a useful starting point for space and occupancy management. Organizations that occupy large amounts of office space will benefit from this information. By integrating building data with human resources data, organizations can reduce vacancy and ultimately achieve major reductions in real estate expenses.

Energy efficiency initiatives

Since commercial and industrial buildings are responsible for almost 20 percent of the energy consumption in many countries, there is a mandate to analyze options to improve energy performance. BIM plays a significant role by facilitating the analysis and comparisons of various alternatives.

Base of ongoing changes

Managing accurate record drawings has long been a challenge for building owners and facility managers. Although BIM does not preclude the effort required to maintain accurate building data, it does provide two advantages over traditional CAD technology:
  • BIM provides an easier means of representing three-dimensional aspects of the building. This is particularly important for representing mechanical systems.
  • BIM models can carry extensive data about assemblies, finishes and equipment items.

Life cycle management

Recent emphasis on sustainability has raised the profile of building life cycle management. Responsible owners are realizing this makes sense both economically and ecologically. BIM provides value in managing relevant data about current building conditions and facilitates the analysis of alternatives. Some building design professionals are embedding data on life expectancy and replacement costs in BIM models, thereby helping an owner understand the benefits of investing in materials and systems that may cost more initially but have a better payback over the life of the building.

Building automation systems

Building automation systems (BAS) provide real-time monitoring and control of the sophisticated electrical and mechanical systems used in today's buildings. Experience has shown that effective building operation is critical to achieving the potential energy savings. Although work is still in early stages, integrating BIM with BAS will provide significant benefits, particularly for technical buildings such as hospitals and laboratories.

Keeping BIM alive

It is common to hear discussion about the BIM handover, implying that useful information will be exported to standardized formats for import into other systems. While there is value in this approach, the one-way migration of data all too often results in the BIM model "dying a premature death." A better approach is to use technology that works bidirectionally between the BIM system and other building management systems. This enables the BIM model to retain its usefulness throughout the life of the building.

Challenges

Although BIM technology has the potential to provide tremendous benefits to facility managers and building owners, there are challenges to overcome.

Deciding what to track

Although BIM makes it much easier to track building information, there is still effort required to develop and maintain information that is current, accurate and relevant. For some building information categories, the cost of doing this simply will not be justified by the value.

Changes in deliverables

The challenge for facility managers and owners is to write contracts that are effective in defining the delivery of useful information. Design intent information is not the same as as-built information. When architects and engineers prepare BIM models for design, bidding and construction, materials and components are defined generically. Specific decisions on manufacturer and product selection are left to the general contractor, the subcontractors and the specialty suppliers. Subject to complying with the design documents, contractors are expected to use this freedom of selection in order to achieve a more competitive cost. Although typical construction procedures call for record documents to be provided to the owner at the completion of a project, this information typically is provided in the form of paper or scanned documents.
BIM has the potential to change this with contractors providing "live" BIM models as part of the commissioning process. However, there are many challenges in defining the best practices for BIM deliverables.

Changes in FM technology skills

To achieve the real benefits of BIM, facility managers will need to attain a basic level of familiarity with BIM tools. More significantly, facility managers will need to develop greater proficiency in information management, learning how to evaluate the importance of different types of information and establishing procedures to keep information accurate and current.

Changes in business relationships

Although BIM can be used with traditional competitive bid construction practices, it provides extra value when the architects, engineers and contractors are all part of a collaborative team. Hence other forms of contracting, such as negotiated bids and integrated project delivery, are enhanced by BIM. In addition, new cloud-based computing technology provides an effective means of sharing building data with all participants of the design-build team, regardless of physical location.

Asian perspective

In past decades, new technology would be used first in North America and Europe with Asia, Latin America and Africa following. However, BIM is being adopted in locations around the world, particularly in the fast growing cities in Asia. For example, the 128-story Shanghai Tower, due to complete construction in 2014, was designed with BIM tools. The government of Singapore is promoting BIM for all new construction projects.

Rather than use older technologies that make maintaining accurate building records difficult, Asian countries are finding the advantages of using BIM technology. Industry practices for maintaining BIM models of record still are developing. It will be necessary to gain more experience in how this rich source of potential information can be best used before best practices emerge.
BIM technology applied to facility management is in early stages. Although the ultimate application of BIM to facility management still is being refined, there are ample benefits today to justify the effort. Architects, engineers, contractors, building owners and facility managers who begin using BIM data today and bridging the information divide will reap the greatest benefits.

References:

  1. BIM Handbook, Eastman, Teicholz, Sacks, Liston, John Wiley & Sons, 2008
Michael Schley is the CEO and founder of FM:Systems, a leading developer of facility management software based in Raleigh, N.C., USA. He is responsible for overseeing FM:Systems operations and guiding the company's product direction.
Schley is recognized globally for his expertise in FM technology and has spoken at numerous conferences throughout the world. He was recognized in 2008 as an IFMA Fellow, chairs the FM Advisory Council for Cornell University and serves on the IFMA Foundation Board of Trustees.
He can be reached by email at mschley@fmsystems.com.

Saturday, April 25, 2015

2015: Future Trends and Predictions


Convergence is the word for 2015 --- Changes in technology are happening at a staggering pace and will cause disruption in industry after industry.  Last year I discussed advances in 3D printing from metal parts to food to organs, the adoption of virtual reality allowing people to connect and interact on the 2D web in a 3D shared virtual world, along with online supply chains giving buyers the ability to connect with suppliers to procure products and services faster and cheaper.

Now let’s fast forward into 2015 and beyond. You'll notice that these three trends from last year blend into my next predictions. Expect these technologies to continue to gain popularity as prices drop and technology improves.
 
Robotic 3D printing

I walked into my friend’s house the other day surprised to see this box shaped robot vacuuming their floors.  Within a few minutes it parked itself in a charging station.  Robots are invading our lives.

If you've had the opportunity to walk through an automotive facility or automated machine shop, robotic welders seem to outnumber humans.  It's called "lights out manufacturing”.  Now combo a robot with 3D printing capabilities and we're embarking on a whole new way to build things -- like 3D printed cars, houses, bridges and consumer products. Hear about it and watch it in action by clicking here.  And watch as a Chinese company 3D prints houses by clicking here.

Laser scanning

The term "point clouds" will become as popular as 3D printing.  We're seeing a huge trend in the AEC (architectural engineering construction) space, as these highly precise lasers capture billions of scanned points from "as built" buildings to help create 3D CAD models in half the time. These points can also be viewed in 3D color and even look like actual photographs so stakeholders can see what their building will look like, digitally, before it’s actually built.  Translation software takes those scanned points into 3D CAD products, allowing designers the ability to create intelligent 3D models, which people can virtually walk through and even 3D print.

Take it a step further and mix in a drone with a mini laser scanner hooked up to it to capture entire cities from the sky. Some 3D lasers can ever go under water to scan the ocean floor and objects, like Autodesk showed at their recent user Conference in Vegas. See it here by clicking here. This opens up a whole new world of opportunity and exploration in the oceanography world. There will be machines at retail locations and amusement parks where people can scan their entire body to create a 3D printed selfie! See an example by clicking here.

Which leads us to our next wave ... 

Augmented virtual reality

In my article last year on 2014 trends, I discussed virtual reality (VR) being all of the hype, and it has come to fruition.  Now, let’s combine VR with augmented reality where you will be able to marry digital content with the real world.  For example, take a facilities team at a construction firm who has to maintain equipment in that building (heating & ventilation, boilers, electrical and plumbing). These service teams, armed with a tablet, can now walk through the hallways of that real building to see every piece of equipment behind those walls, in real-time viewed in 3D intelligent CAD models.  Facility managers will be able to pinpoint where problems occur without having to tear down walls and guess.  Take that a step further to wastewater and underground equipment and the application is limitless.

Nanotechnology materials and products

Altering the chemical makeup of materials at the molecular level creates an entirely new species of products. Nanotechnology is altering the lifespan of products using plastics, paint and even ink. Products will have longer shelf life and greater resistance to human and environmental factors. There will also be the ability to print microprocessors that are paper thin, then embed them in electronic devices, print electronic connectors in magazines as illuminating advertisements, and even create devices in our bodies to combat diseases.

Product customization

My 13 year old son and I have contests online to see who can design the ugliest basketball shoes, where we customize everything down to the shoelaces.  I saw this wave coming as early as the Dell days when you were able to fill out a checklist of items (product configurators), and BOOM, you had your very own personalized workstation or laptop.

From shoes to phone cases, people love to make products their very own.  Combo that with 3D printing and the other topics discussed above and you'll understand how interconnected and interdependent these technologies will become.  See how Amazon creates this experience by clicking here.   I'm even envisioning a day when there will be 3D printed tattoos.  Just make sure you spell your spouse’s name correctly. 

All company brands and product names are used for identification purposes only and may be trademarks of their respective owners.

Ken Wilson is an advisor in the CAD-CAM Manufacturing and Construction industries with a strong understanding of the entire design to manufacturing workflow process.  Ken created CAD/CAM Connect (www.cadcamconnect.com) an online network of trusted vendors -- connecting buyers to top suppliers helping companies solve problems and get products to market faster to win new business.  For more information, you can contact Ken by calling 1.(844) CADCAM1 or by email at ken@cadcamconnect.com

CAM Software Best Practices


The implementation of a CAM (computer-aided machining) system into your CNC machining workflow process can help you produce parts more efficiently, maintain and improve overall quality and help you win new business.
 
While “automation” is the idea behind CAM software, shops around the world still struggle to become profitable, efficient in their CNC machining process while trying to maintain a competitive edge.  Let’s take a closer look at the subject of CAM software and how the implementation of it can contribute to improving programming times and your overall business.

Choosing the Right CAM Software
 
The projected manufacturing demographics for CNC shops and CNC machine consumption for 2014 tell us that shops between 1-19 employees are expected to grow by more than 50% this year over 2013.  5 Axis CNC milling machine tool purchases are expected to see a staggering 276% increase, while horizontal machining centers follow at a 118% increase. These projections tell us that companies using CNC machines are growing and they’re going to need to automate their manufacturing processes.
Let’s face it a CNC department without a CAM programming software is like a product design department without CAD.  The two should be thought of as one cohesive unit.  And even though many manufacturers already have some form of CAD-CAM implemented, not one CAM software system offers everything to meet all of their job requirements.  That leads us to the overall workflow process …
 
CAD Files & Compatibility
 
So how does CAD/CAM software improve production workflow? First, we have to dissect each stage of the process.  It begins with how you acquire your part model.  Most manufacturing businesses start with a 3D model of a part either designed by you in CAD (computer-aided design) software, from a print (paper-PDF) or a digital CAD model provided by your client.   SolidWorks, AutoCAD, Inventor, PTC-Creo, and CATIA are examples of CAD programs you might get files from. Therefore it’s critical that a CAM system has the ability to import or open CAD design files.  

Why start from scratch.  CAD systems generally have their own native file types.  Among the most common are STL, STEP, IGES, DXF, DGN, SLDPRT and others.  Some CAM packages may already have some slimmed down CAD editing tools built in.  Others offer fully integrated plug-ins allowing them to operate within the NATIVE CAD software, therefore reducing geometry translation issues while streamlining the design to machining process.
 
CAM Job Management & Setting Up Your Stock
 
Once the part file is ready to move into the toolpath and programming stage, toolpath strategies can be used and a program can be created in its proper sequence allowing you to turn machining operations on and off, re-order operations, post process and basically manage everything about the job program right within the software interface.
 
So what would be the optimum order of production in this stage of the workflow process?
 
1.       Creation of the stock for your part so that a machine setup can be created
2.       Followed by your material and the tools being used since it impacts the speed and feed settings within CNC toolpath.  

3.       Workflow improvements also take place in the ability to easily access and setup your cutting conditions and tool patterns (multi-tool operations such as a counter bore or hole drilling with a center drill, drill and possibly a chamfer), tool crib and tool holder data.  This is important to create an error free NC program.
 
  4.     Next, you will need to access a tool library for all of your tools.  The tool library should include all tool data, material, diameter, angle, length, labels and more that you will be using for all machining strategies within the job tree manager.  All of this information makes the process of setting up a job faster if you have the ability to save set up details globally or separately from job to job.  Another effective feature for saving time is the ability to save and load machine features.  Many shops do a lot of the same types of jobs.  (If you already setup your CAM for one job, then you can use that setup for another similar job.   The idea here is “automation” so every opportunity to increase efficiency counts.) 

5.       Once you have set up the stock, tools, material and cutting conditions, next, you will want to set up the post processor for your job.  The post processor is the translator used in the process of converting the setup data and toolpath data and creating a numeric language (G-Code) then you will send to the machine tools controller to physically machine the part.  Think of it as a print driver for your printer. 

Important note: Most CAM systems offer generic post processors. Some offer the ability to customize a post processor to meet the requirements of the controller on the machine.  Check with the software provider for a library of post configuration files, particularly the one for your specific machine tool.  Workflow efficiency can be achieved by having the software provider assist you in the creation or modification of posts.  A correct post processor eliminates the need for you to have to hand edit code. Thus, allowing you to spend your time focusing on cutting parts.

Toolpath & Machining Strategies
 
The next stage in the process of using CAM software involves the creation of toolpath (cutter-path) which is the actual path that the cutting tool takes to machine the part.  A CAM Tree-Job Manager will help you keep each machining operation organized and properly sequenced so that the g-code program produces the best possible cycle time for the job. 2, 3, 4 & 5 axis toolpaths are all developed to produce efficient roughing and finishing cycles.

The machine setup should already be created in the Job Tree because you already setup your stock.  A Machining Wizard is a series of dialog boxes that step you through a process with a “Next” button until done where a “Finish” button would close the wizard and save everything you set for a toolpath machining strategy. When Wizards are used in the creation of toolpath two (2) things happen.
 
1.    New users create programs in a fraction of time over toolpath creation without using wizards
 
2.   Nothing is forgotten or left behind in making a toolpath that is accurate and properly calculated based off of the tools you setup for the job.
 
Toolpath Wizards start by allowing you to choose the areas of the part to apply a specified toolpath (planar, spiral, z-level etc) within a boundary or an entire part, set clearances and height of rapid moves for the tool.  Then you can choose the type of cutting pattern (zig-zag or single direction cutting), cutting direction (climb or conventional), roughing parameters, custom tolerance and cut-depth options, lead-in and out options, toolpath linking options (how you want to connect one path to another) and other custom machine options.
When finished, you will automatically generate the toolpath so you can visually inspect it. This takes place for each separate operation. If a change is needed you can simply go back into the operation and edit it. Then re-generate the toolpath. Once you have created toolpath for each operation, you are ready to move into the next phase of the process.
 
Improvements in workflow efficiency can also be accomplished by using high speed toolpaths. High Speed Machining  (HSM) is a revolutionary method of cutting where the traditional hard right and left turns in the cutting path are changed to produce more rounded or circular style cutting movements.
 
In some cases the high speed cut paths may be longer in overall length with this type of cutting path.  However, the benefits are less tool-material collision which proves to extend the life of cutting tools.  In addition, cutting speeds are typically increased (high-speed) which proves to reduce overall cycle times. High Speed toolpath was initially developed for 2 Axis machining (pocketing type operations).  
 
Other toolpath strategies include Advanced Roughing that allows the user to enter an Intermediate Step variable which tells the software to rough down to the bottom of a cavity and then come back up the outer walls stopping at each specified intermediate level and remove the material that tends to look like a large stair step on the walls of the part. This improves roughing quality and cuts down on the amount of material that the finishing tool has to remove, all in one operation.
 
Lastly, workflow efficiency can be achieved in what is called, “Toolpath Associativity.” Associativity is the ability to make a design change to a part and automatically update toolpath operations without having to re-create an entire job. This is highly advantageous when there are many operations within a single job. 

Simulation & The G-Code Program
 
The final stage in the CAD/CAM programming phase is typically the toolpath simulation and creation of an NC program file that can be sent to the machine tool. The simulation process allows the programmer to visually see the process and catch any errors within the program -- gouges or collisions.  Simulation also offers the ability to calculate cycle times as well as “machined part deviation” where you can visually inspect the part for areas that cutting tools did not fit in or cut during the machining process.    

Typically a number-color system is used to visually detect deviation areas, tools and machining operations. Advanced Machine Simulation allows you to use your machines Kinematics to simulate the actual machines motion as well as the toolpath operations.
The final stage is the generation of the NC file that is sent to the CNC machine. This is a critical stage of the process due to potential loss of valuable time due to hand editing g-code programs. Once a completed post processor is created, a CAM product should allow you to automatically create code that is clean and edit free. 
RS 232 and DNC communications is then used to send the completed program to the CNC machine tool which is used to cut the part from the specified material and with the specified tools that you input. 
 
Improving Efficiency & Beyond
 
These are the general stages of the CAD/CAM CNC programming process along with examples of how you can improve the efficiency of your programming workflow by using it.  While it is easy to say that CAD/CAM software should be simple to use, what is equally important is training.  Ask the vendor or reseller if the software comes with training? Are there training videos that allow you to learn on your own time? Are there local seminars or one-on-one web based training sessions available for you to learn on the fly and on your own time? The more options the better which includes the ability to achieve operator certification as a professional.
 
We hope you found this article useful in helping you either be more efficient with the CAM system you already own, or if you’re in the process of investigating one, to know what questions to ask and the benefits that come with owning one.  For more information email info@cadcamconnect.com, or call 1-844-CADCAM1.
 
Thank you to BobCAD-CAM for their contributing content www.bobcad.com
 
About CAD/CAM Connect
With over 100 years combined experience in the CAD/CAM Manufacturing industry and literally thousands of contacts, CAD/CAM Connect hosts an online network of trusted hardware, software and service vendors -- connecting buyers to top suppliers via our sites.  

Products and services ranging from CAD and CAM software, CNC machines, 3D printers, CAD training, reverse engineering, rapid prototyping, FEA-CFD simulation software, translators, ERP, data management, 3D part catalogs, contract CAD help, job placement and more. 
www.cadcamconnect.com and www.cadcamreviews.com